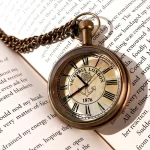
Introduction to Vintage Stopwatch Restoration
Restoring a vintage stop watch can be a fulfilling project. It combines the joys of bringing old engineering back to life with the satisfaction of hands-on work. This guide will walk you through the process of breathing new life into your old timepiece.
First, you need to understand what you’re dealing with. Vintage stopwatches are delicate instruments. They have many tiny, intricate parts. It’s essential to approach the restoration with care and patience. These old devices tell stories — not just time — and we handle them with respect.
The process of restoration is multi-faceted. You’ll clean and polish components, repair or replace parts, and recalibrate the mechanism. Each step is crucial to restore the stop watch to its former glory. The goal is to achieve both aesthetic beauty and accurate timekeeping.
Whether you’re an experienced collector or a novice, this guide will provide step-by-step instructions. It’s tailored to help you understand the nuances of different makes and models. We’ll assist you in identifying your stop watch’s unique characteristics. This ensures a successful restoration tailored to your specific old timepiece.
In the following sections, expect to learn about the tools and materials needed. You’ll discover how to disassemble and clean each part thoroughly. We’ll cover how to repair or replace damaged components. Finally, we walk you through reassembly, lubrication, calibration, and testing.
Begin your vintage stop watch restoration journey with confidence. We aim to equip you with the knowledge to perform a successful restoration. Let’s bring those treasured old stopwatches back to life!

Tools and Materials Needed for Restoration
Beginning the restoration of your old stop watch requires the right set of tools and materials. Proper preparation is vital to ensure that you do not damage the intricate parts of your timepiece. Below is a simple list of essentials you’ll need to gather before starting your restoration project.
- Screwdrivers: A variety of small screwdrivers are essential for removing and securing tiny screws.
- Tweezers: Precision tweezers will help you handle small components with care.
- Magnifying Glass: This is crucial for seeing small details and intricate mechanisms.
- Cleaning Solvent: Choose a solvent designed for cleaning delicate watch parts.
- Soft Cloths: Use these for polishing the case and crystal without scratching.
- Polishing Compound: This will restore the shine to metal components.
- Replacement Parts: Source any necessary replacement parts specific to your stop watch model.
- Lubricant: Special watch lubricant is necessary for proper movement function.
- Watchmaker’s Bench Mat: A soft mat will protect parts during disassembly.
- Caliper: Use this tool to measure parts, ensuring the right fit during reassembly.
Each tool plays a critical role in the restoration process. From disassembling your old stop watch to handling the smallest spring or gear, you need to equip yourself adequately. Taking the time to gather these tools and materials will make the restoration process smoother and more enjoyable. Let’s move methodically to ensure your stop watch restoration is a success.
Identifying the Make and Model
Before dismantling your vintage stop watch, identifying its make and model is crucial. This knowledge will guide you in sourcing the correct parts and understanding the specific mechanisms involved. Here’s how you can determine the identity of your old stop watch:
- Check for Markings: Look for manufacturer’s marks, serial numbers or model names on the case back, movement, or dial.
- Refer to Guides: Use collector’s guides, old catalogs, or online databases to match your stop watch to known makes and models.
- Consult Online Forums: Watch enthusiasts’ forums can be valuable resources to help identify your timepiece.
- Seek Expert Advice: If you’re still unsure, consider seeking help from a professional watchmaker or a seasoned collector.
Once you’ve identified your stop watch, take note of the distinctive features and specifications. This information will be vital when you clean, repair, or look for replacement parts. It’s also helpful to understand the history and typical issues of your particular model. That way, you can anticipate what kind of care and restoration your old stop watch may require. Armed with this knowledge, you’re ready to move on to the next step: disassembling the stop watch with confidence and precision.
Disassembling the Stopwatch
Disassembling an old stop watch is a delicate task. Attention and precision are key to avoid damages. Follow these steps to dismantle your timepiece properly.
- Prepare Your Workspace: Set up a clean, well-lit area. Use your watchmaker’s bench mat.
- Gather Your Tools: Keep your screwdrivers, tweezers, and magnifying glass close at hand.
- Remove the Case Back: Carefully unscrew or pop open the case back using the right tool.
- Detach the Crown and Stem: Gently pull out the crown and unscrew the stem, if applicable.
- Release the Movement: Some stop watches have screws or clips holding the movement. Remove these next.
- Document Each Step: Take photos or notes. It aids reassembly and tracks tiny parts.
- Separate the Components: Group screws, gears, and plates. Store them so you do not lose any.
Take your time with each stage. Rushing can cause irreplaceable harm to the stop watch old mechanisms. The goal is to achieve a smooth disassembly, keeping all parts secure and organized for the following stages of your restoration project.
Cleaning and Polishing the Components
After disassembling your old stop watch, cleaning and polishing each component is your next step. This process is vital for the restoration. It not only improves the aesthetic appeal but also the functionality of your vintage timepiece. Here’s what you need to do:
- Dismantle Further if Needed: If you haven’t already, take apart the movement into individual pieces.
- Clean the Parts: Immerse the metal pieces in the cleaning solvent. Use a soft brush for hard-to-reach places.
- Rinse and Dry: After soaking, rinse the components with distilled water. Dry them carefully with a soft cloth.
- Inspect the Parts: Look for rust, wear, or damage. Treat these issues before moving to the next step.
- Polish Metal Components: Use the polishing compound to shine cases, backs, and gears.
- Clean the Dial: Gently wipe the face with a damp cloth. Be delicate to avoid smudging or fading numbers.
- Buff the Crystal: Apply a small amount of the compound, and buff the watch glass to remove scratches.
Remember to keep each step gentle. Avoid harsh chemicals or rough handling that might damage your stop watch parts. Each polished part will contribute to your old stop watch looking and working like new again.
Repairing or Replacing Parts
Once you’ve cleaned and polished the components of your stop watch, it’s time to address repairs. Examine each part for signs of wear or damage. Pay close attention to gears, springs, and the escapement. These areas often need the most work in old stop watches. Here are some steps to guide you:
- Assess Each Component: Look for parts that are worn out, damaged, or missing. These will need repair or replacement.
- Source Replacement Parts: Find the right parts that match your stop watch’s make and model. Use reliable suppliers to ensure quality.
- Handle With Care: Replace broken components gently. Use tweezers and screwdrivers to avoid damaging new parts.
- Check Compatibility: Make sure new parts fit perfectly. They should match the specifications of the original pieces.
- Skillful Repairs: If you can, fix small defects instead of replacing. This keeps the stop watch original.
Keep in mind, some parts may be rare or hard to find. Patience is key when searching for the right pieces for your old stop watch. If in doubt, seek help from a professional. A skilled watchmaker can offer advice or perform challenging repairs.
In the next section, we’ll go over how to reassemble your stop watch. We’ll ensure that every part is back in its place, working smoothly together.
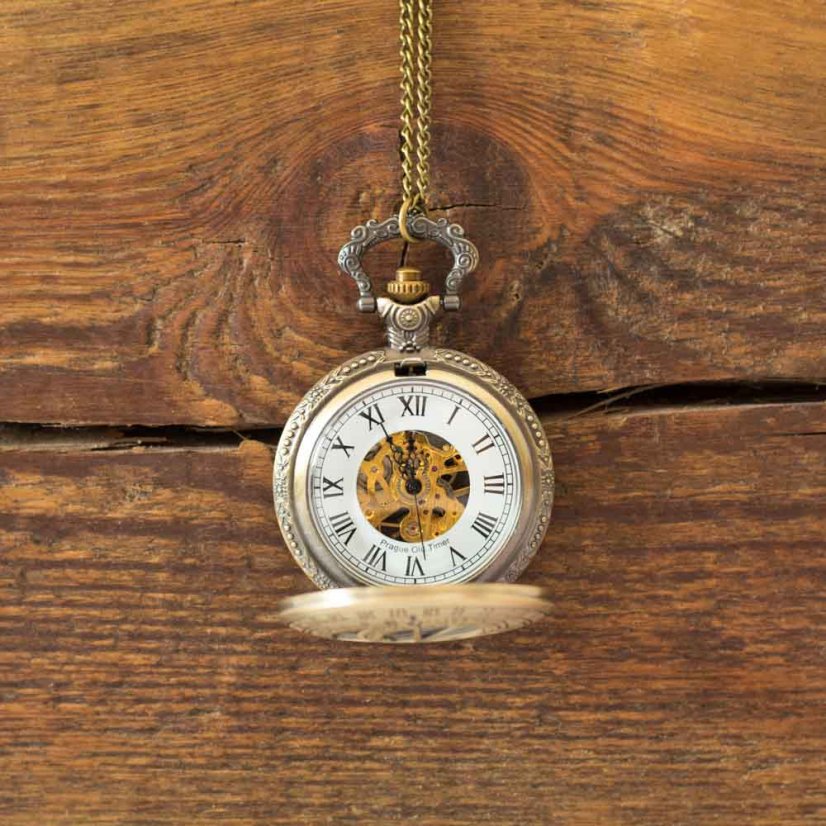
Reassembling and Lubricating the Stopwatch
Reassembling your old stop watch is like solving a puzzle. Each part must fit in its right place. Start by placing the movement back into the case. Do this gently. Secure it with the necessary screws or clips. Use your documentation as a guide to recall where each part goes.
Next, work on the gears and springs. Fit them with precision. Use your tweezers to avoid slipping. After reassembling the internal mechanisms, focus on the crown and stem. Attach them carefully to ensure they can wind the stop watch and set the time.
Now, it’s time to lubricate. Apply watch lubricant on the moving parts. Do this with a steady hand. Use just enough to avoid over-lubrication. The goal is smooth movement without excess oil that can attract dirt.
Once lubricated, close the case back. Make sure it seals well to protect the inner workings.
You’ve put the pieces back together. Your stop watch old mechanics should now move freely. The stop watch is almost ready. It should look clean and the parts should fit just as they did when it was new. In the next step, we will calibrate and test your stop watch for accurate timekeeping. Stay patient and precise to achieve the best results.

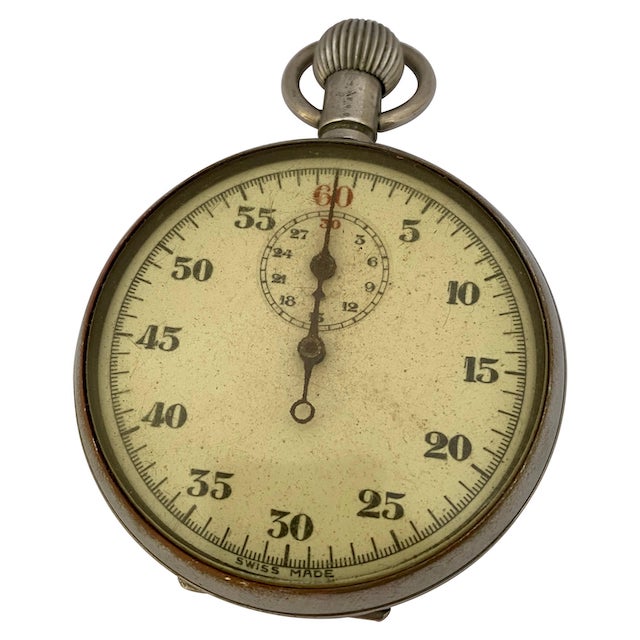
Calibration and Testing
After reassembling and lubricating your old stop watch, calibration and testing are crucial. These steps ensure your timepiece keeps time accurately. Follow this simple guide for calibration and testing.
- Attach to a Timing Machine: Secure your stop watch to a timing machine. This device measures its accuracy.
- Check for Deviations: Note any time deviations. A vintage stop watch may not match modern standards, but it should be consistent.
- Adjust as Needed: Use small adjustments. Turn the regulator screw slightly to correct the timekeeping.
- Test Over Days: Observe the stop watch over several days. Check for any loss or gain in time.
- Check the Stopwatch Function: Start, stop, and reset the stopwatch. It should function smoothly.
- Final Inspection: Give your stop watch a close look. Make sure everything works as it should.
Getting calibration right might take time. If you encounter issues, repeat the process. Aim for the best balance between precision and the vintage charm of your stop watch. Once testing is complete, your restoration project is finished. Enjoy the satisfaction of bringing an old stop watch back to life!